On this post I’m gonna show you how I make a Simple POS System with PHP and JS, if you want to see all the project completed or just get the code, you can find it on this GitHub repository (Just click the link).
Requirements
- A server that support PHP, If you want to try this on your local machine, I recommend to use MAMP for Mac, MAMP for Windows or XAMPP for Linux (XAMPP is also available for Mac and Windows users).
- An IDE or Text editor, if you need some recommendation, please see Visual Studio Code (Available for Mac, Linux and Windows)
- This is just required if you want to create the project step by step or modify the files.
Some screenshots
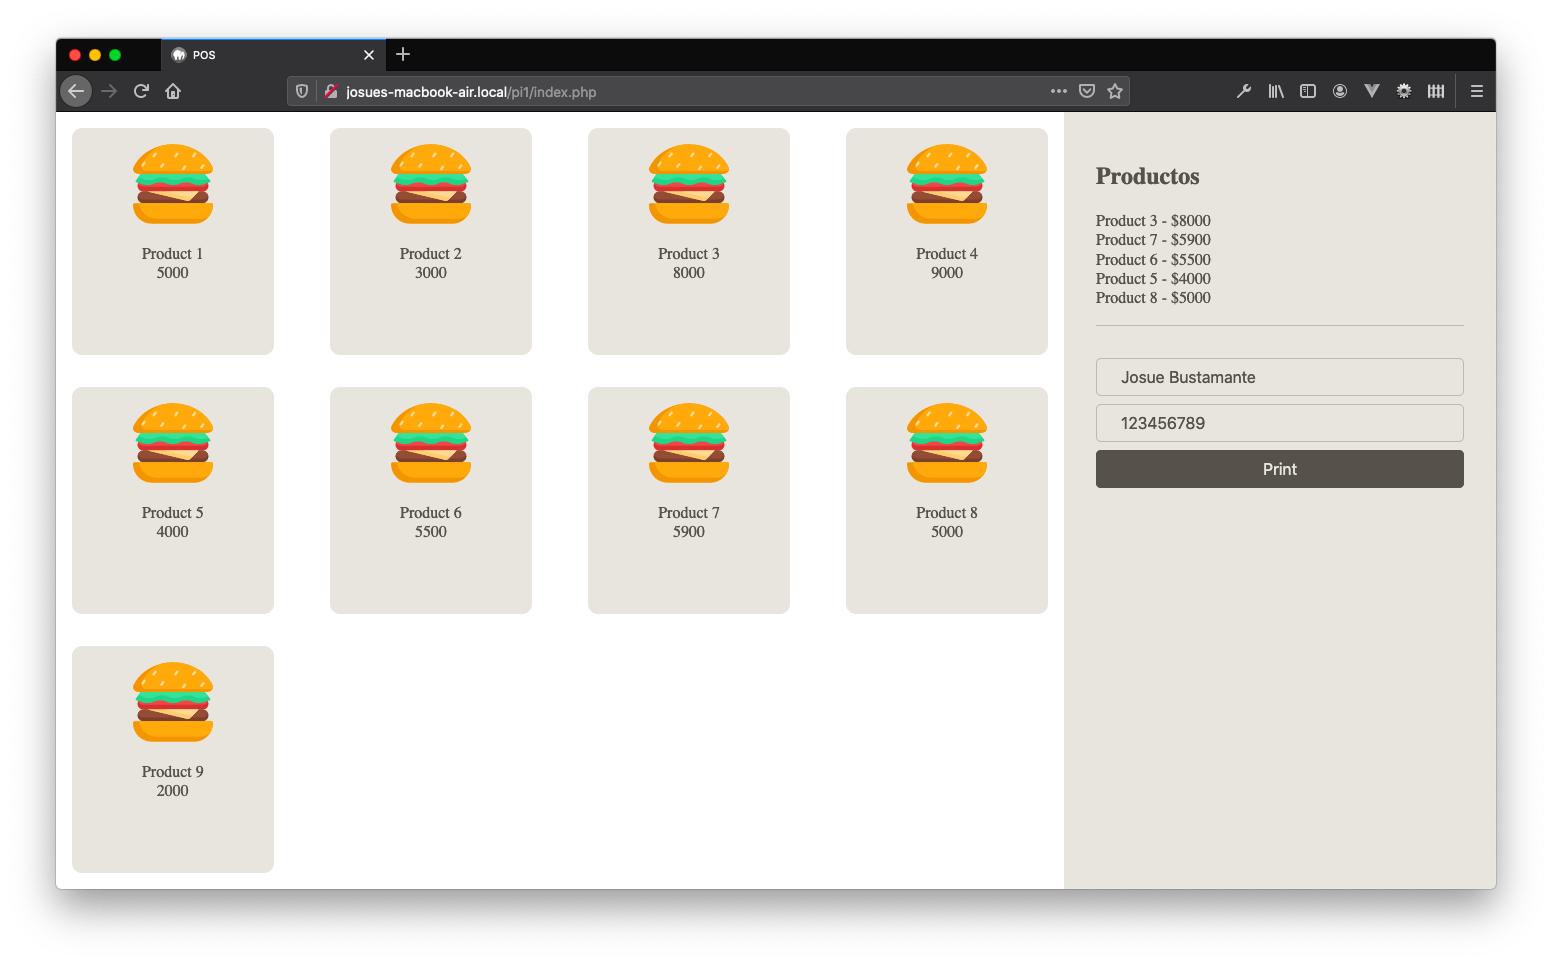
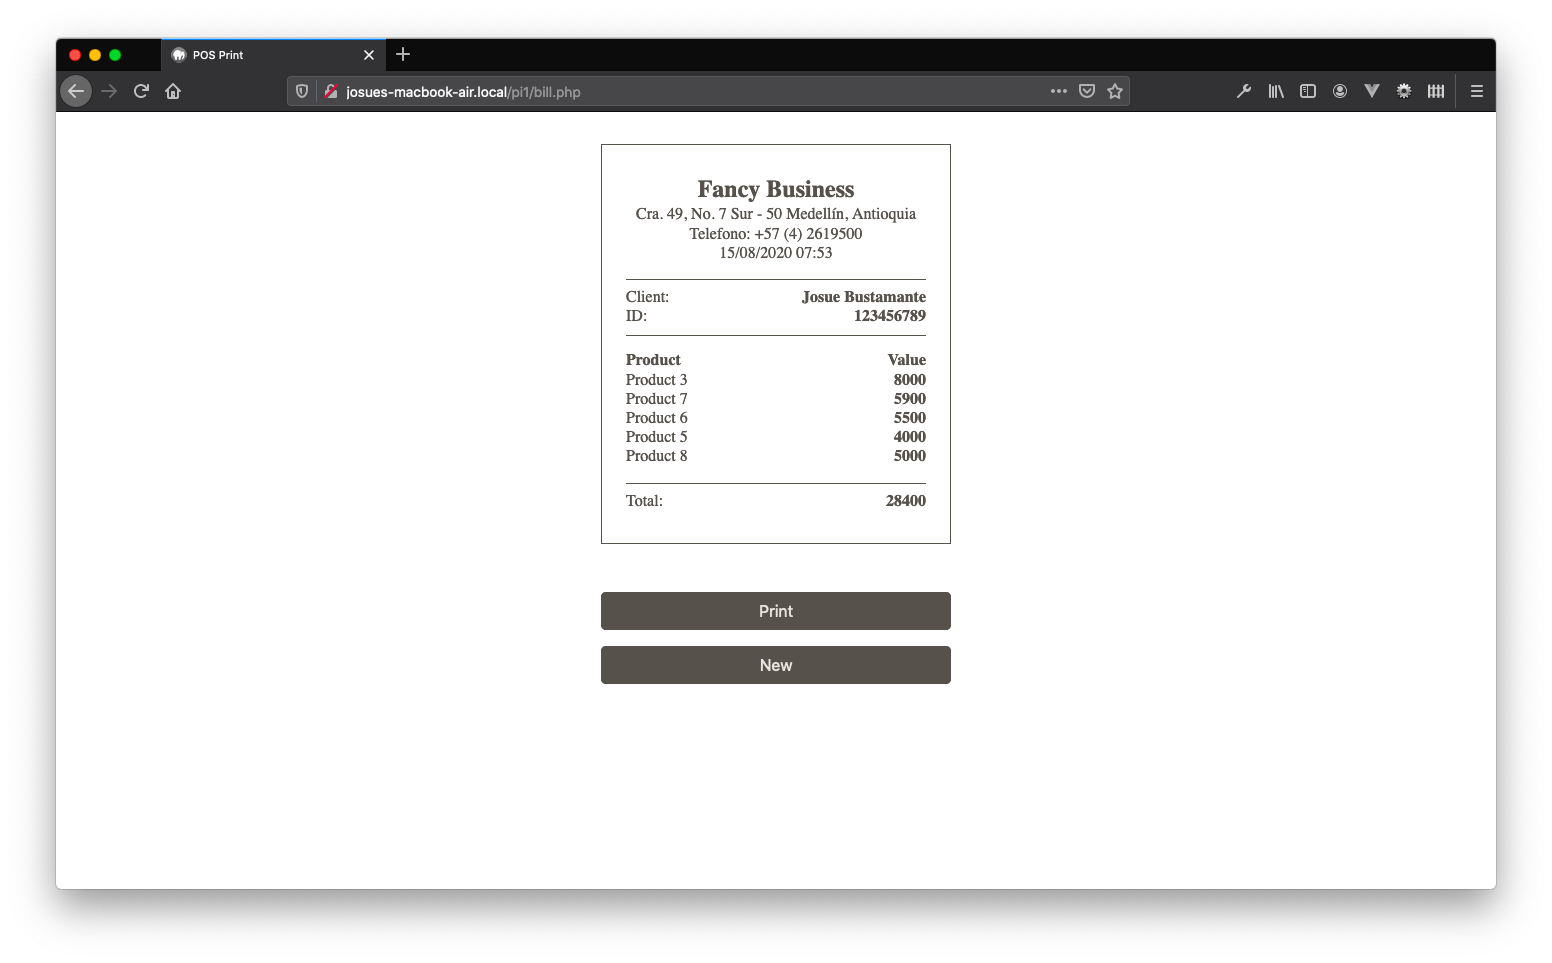
The idea
The idea for this project is to create the POS System on the most simple way, without using any database (DB) and just PHP, Javascript (JS) and CSS (and also one image). So, for this project I decided to go with this folder/files structure.
POS
├── bill.php # The file that shows the bill
├── images # Images folder for the products, (Actually just the hamburguer icon)
│   └── hamburguer.svg
├── index.php # The init file for the project, also, this is the pick page for the products
├── products.php # The file that store the products and their information
└── style.css # The stylesheet for the pages
With this structure on mind we have an idea on how we going build this project. So we gonna start with the products page, this is were we gonna save the info for each product.
Let’s start!
products.php
<?php
  $products = array(
    array( 'name' => 'Product 1', 'image' => 'hamburguer.svg', 'value' => 5000 ),
    array( 'name' => 'Product 2', 'image' => 'hamburguer.svg', 'value' => 3000, ),
    // ... More items here
    array( 'name' => 'Product 9', 'image' => 'hamburguer.svg', 'value' => 2000, ),
  );
?>
This is our flat file database for the products, on this file we create a 2 dimmensions array (one dimmension for the products and the other one for the details of the products). Each product has their name (name), a price (value) and an image name (image) that is located into /images/ folder.
* You just need to follow the structure of each line to add more items to the list.
index.php
On this page we want to have 2 sections, one where we can see the products that we have on products.php and other where we can see the selected products and where we want to proceed to print the bill. So, for this we going to create a little HTML into the PHP file.
You can get/download the image from the GitHub Repository or clicking here
<!DOCTYPE html>
<html lang="en">
  <head>
    <meta charset="UTF-8">
    <meta name="viewport" content="width=device-width, initial-scale=1.0">
    <title>POS</title>
  </head>
  <body>
    <section class="products">
      <div class="product" data-index="0" data-name="Product 1" data-value="5000">
        <img src="./images/hamburguer.svg" alt="Product 1">
        <p class="product-name">Product 1</p>
        <p class="product-value">5000</p>
      </div>
    </section>
    <section class="bill">
      <div class="bill-products">
        <h2>Productos</h2>
      </div>
      <div class="bill-client">
        <form method="POST" action="./bill.php">
          <div class="hidden">
            <label for="products">Products</label>
            <input type="text" name="products" id="products" placeholder="Products" value="">
          </div>
          <div>
            <label for="name">Name</label>
            <input type="text" name="name" id="name" placeholder="Client Name">
          </div>
          <div>
            <label for="id">ID</label>
            <input type="text" name="id" id="id" placeholder="Client ID">
          </div>
          <div>
            <input type="submit" value="Print">
          </div>
        </form>
      </div>
    </section>
  </body>
</html>
After adding this code into your php file, save the file and go to the browser, you need to see something similar to the next screenshot.
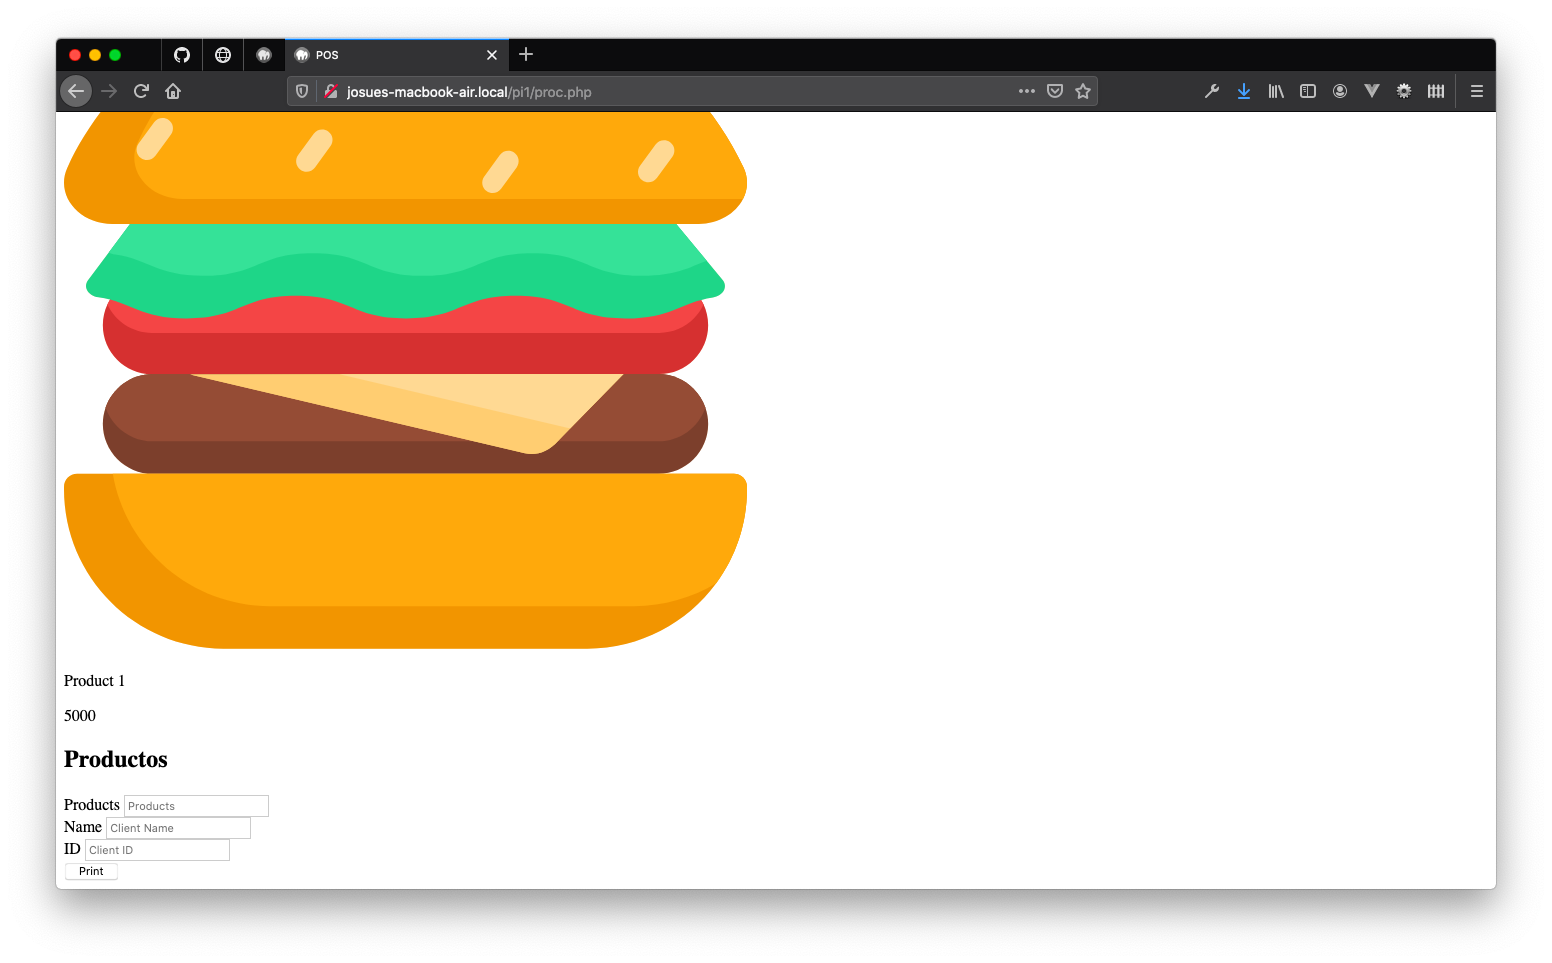
You may think! Well, this is not dynamic, I need to add all the products from my _products.php_ file. Yeah, that is our next step, add all the products dynamically.
So, for this step we need to import or include the products.php into our index.php and that’s the easy way! Just add the following lines to the top of your index.php.
<?php
  @include_once( './products.php' );
?>
After that, we need to touch some of the HTML, precisely the section between <section class="products"> and </section>. We need to change all the HTML that is inside that tags and change for the next PHP (Spoiler: This is a PHP cycle).
<?php
  foreach ( $products as $key => $product ) { ?>
    <div class="product" data-index="<?php echo $key; ?>" data-name="<?php echo $product['name']; ?>" data-value="<?php echo $product['value']; ?>">
      <img src="./images/<?php echo $product['image']; ?>" alt="<?php echo $product['name']; ?>">
      <p class="product-name"><?php echo $product['name']; ?></p>
      <p class="product-value"><?php echo $product['value']; ?></p>
    </div>
  <?php
  }
?>
So, you’re seeing all the products now, and that’s great, but is time for style and make this pretty, isn’t it?. It’s time for CSS!
This is the last change for our index.php (for the moment). We need to import the CSS into our HTML file. Just add the next file into your HTML head tag, after the title tag.
<link rel="stylesheet" href="./style.css">
style.css
Let’s add some style for the body. Just to aggregate some general styles to our project and rewrite some default styling from the browser that we don’t need.
body {
  color: #56514B;
  font-size: 16px;
  margin: 0;
  padding: 0;
  display: flex;
  flex-direction: row;
  min-height: 100vh;
}
After this let’s style the products section
/* Making this section of the 70% of the page
    and giving some instructions on how the items need to be show */
section.products {
  flex: 0 0 70%;
  display: flex;
  flex-direction: row;
  flex-wrap: wrap;
  justify-content: space-between;
}
/* Let's add some style for each product box */
section.products > div {
  background-color: #E7E5DD;
  border-radius: 10px;
  box-sizing: border-box;
  padding: 1rem;
  position: relative;
  margin: 1rem;
  flex: 0 0 20%;
  text-align: center;
  cursor: pointer;
}
/* Solving click event bug
    This adds a layer upper the button to make sure that
    each time we click the product the JS run's on how is planed */
section.products > div:after {
  content: '';
  display: block;
  position: absolute;
  width: 100%;
  height: 100%;
  top: 0;
  left: 0;
}
/* Giving maximum size for the images */
section.products > div > img {
  max-height: 5rem;
  max-width: 5rem;
  margin-bottom: 1rem;
}
/* Clearing margins and paddings from text */
section.products > div > p {
  margin: 0;
  padding: 0;
}
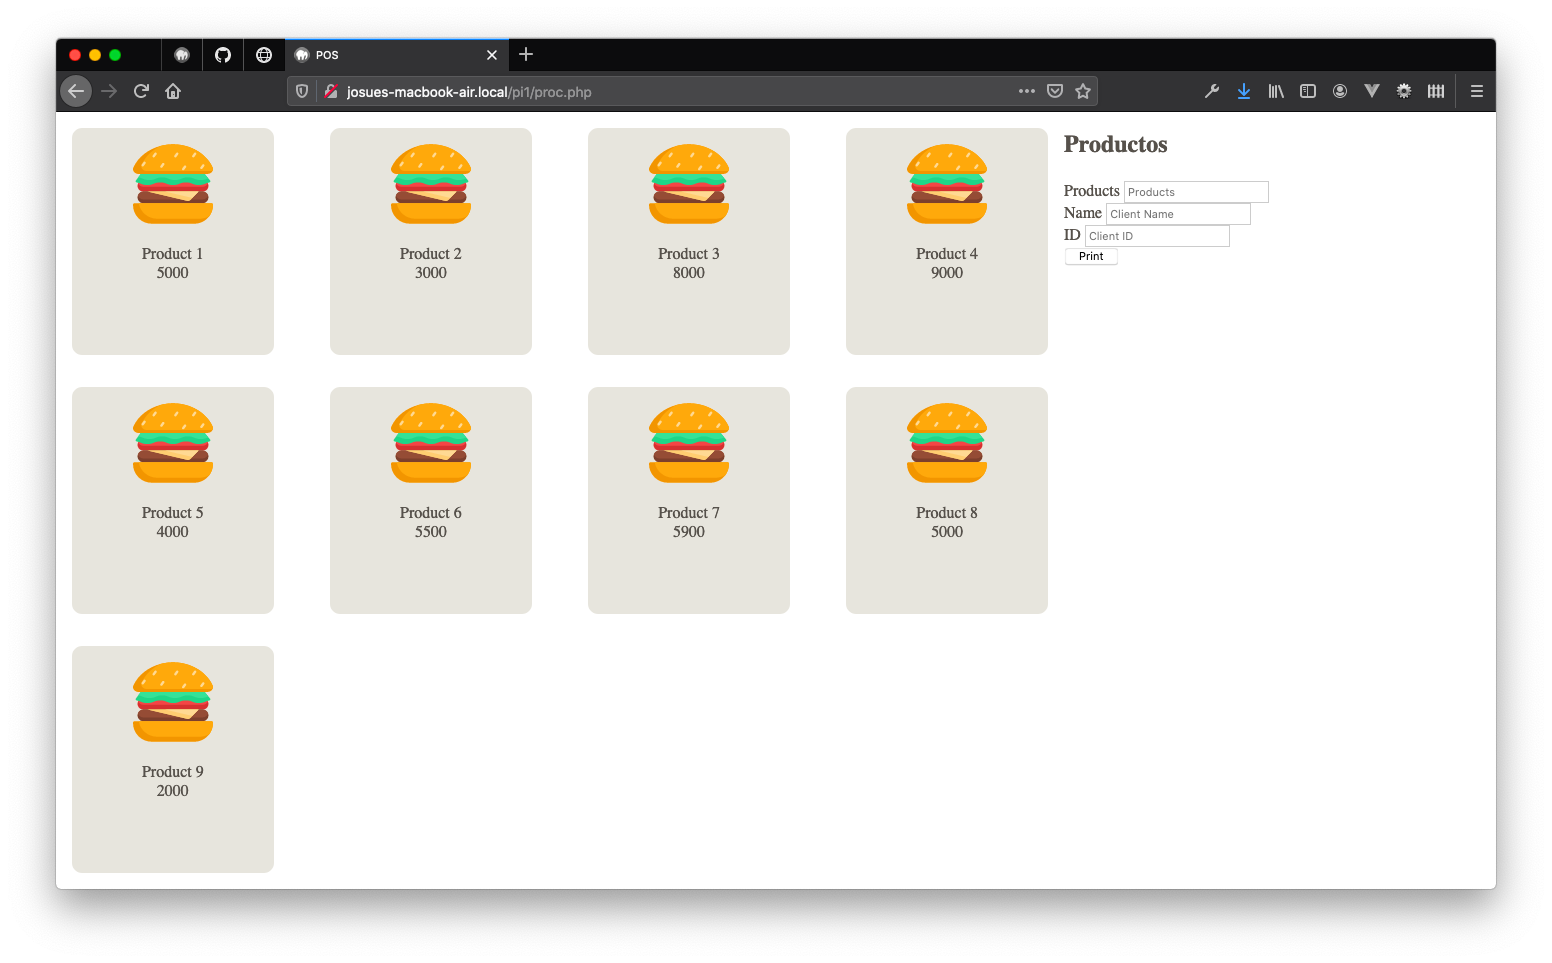 If you go to the browser, You need to see something like the screenshot above, now, we need to style the right size of the window, the
 "bill" section.
/* Making this section of the 30% of the page,
    also giving some background color
    and spacing into the box */
section.bill {
  background-color: #E7E5DD;
  box-sizing: border-box;
  flex: 0 0 30%;
  padding: 2rem;
}
/* Giving some space into the products and the form */
section.bill > .bill-products {
  border-bottom: 1px solid #BDBBAD;
  margin-bottom: 2rem;
  padding-bottom: 1rem;
}
section.bill > .bill-products p {
  margin: 0;
}
/* Let's hide the products input,
    we don't need the user modify by hand this input */
/* _SPOILER: We going to change this value via JS_ */
section.bill form .hidden {
  display: none;
}
/* On the next lines...
    Styling the form, and their components.
    Input texts and buttons (and theis hover action) */
section.bill form > div {
  margin-bottom: 0.5rem;
}
section.bill form label {
  display: none;
}
section.bill form input[type="text"] {
  display: block;
  background: transparent;
  border: 1px solid #BDBBAD;
  border-radius: 5px;
  box-sizing: border-box;
  color: #56514B;
  font-size: 1rem;
  padding: 0.5rem 1.5rem;
  width: 100%;
}
section.bill form input[type="submit"] {
  display: block;
  background: #56514B;
  border: 1px solid #56514B;
  border-radius: 5px;
  box-sizing: border-box;
  color: #E7E5DD;
  font-size: 1rem;
  padding: 0.5rem 1.5rem;
  transition: 0.3s ease-in-out;
  width: 100%;
}
section.bill form input[type="submit"]:hover {
  background: #E7E5DD;
  border: 1px solid #56514B;
  color: #56514B;
}
The result after some styling (a.k.a. CSS):
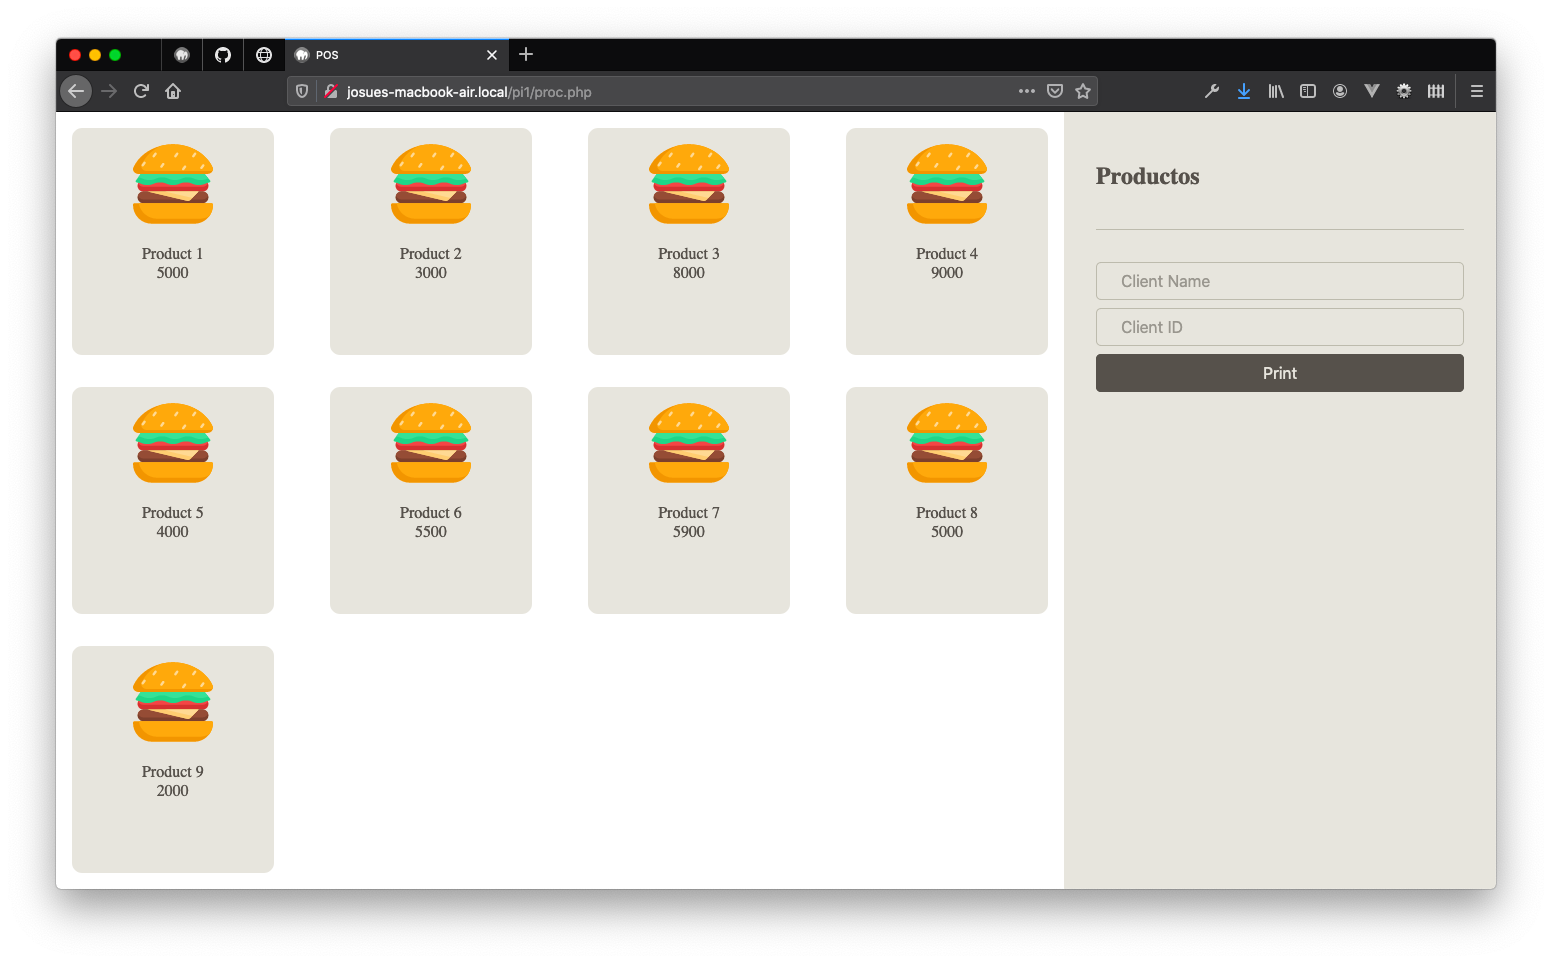 Looks better, isn’t it? Now, I know…
 This is plain! we need interaction on the client side. Yes! It’s time for some magic and Javascript super powers.
index.php
Let’s add some JS to our index.php, you can add this into one .js file appart or you can add this into script tag at the bottom of the HTML (before body close).
<script>
  // JS Here!
</script>
The code that we need to add is this…
// The browser runs this fuunction after reading it.
(function() {
  // We nee to instance some of the DOM content on our JS
  let products = document.querySelectorAll('section.products > .product');
  let billProducts = document.querySelector('section.bill > .bill-products');
  let productsInput = document.querySelector('section.bill #products');

  // Clearing the products input after browser loads the page
  productsInput.value = '';

  // For each product we ask the browser to add the product to the bill and products input
  products.forEach( product => {
    product.addEventListener( 'click', function( e ) {
      // Getting the info from `data` attributes of the HTML object
      let index = e.srcElement.dataset.index;
      let name = e.srcElement.dataset.name;
      let value = e.srcElement.dataset.value;

      // Create a p tag with the info of the product into bill section
      let p = document.createElement('p');
      p.innerHTML = name + ' - $' + value;
      billProducts.appendChild( p );

      // Add the product id on the products input
        //  If the alue is empty, we just add the index
        //  else, we need to add a , (comma) and after that the index
      if ( productsInput.value == '' ) {
        productsInput.value += index;
      } else {
        productsInput.value += ',' + index;
      }
    });
  });
})();
Now we have our index.php ready! If you click the Print button you may see the url change to bill.php. Now we gonna make that file and finish our project.
bill.php
Now, for this page we want to have 2 sections, one for the bill (that is the content we want to print) and one for the buttons or actions for print and back to the home.
So, we need to create this file with a basic HTML structure, adding also the products.php info to it and the css. Here is the code.
<?php
  @include_once( './products.php' );
?>

<!DOCTYPE html>
<html lang="en">
  <head>
    <meta charset="UTF-8">
    <meta name="viewport" content="width=device-width, initial-scale=1.0">
    <title>POS Print</title>
    <link rel="stylesheet" href="./style.css">
  </head>
  <body class="bill">
    <section id="bill-print" class="bill-print">
      // This is the Bill box
    </section>
    <section class="bill-actions">
      // This is the Actions box
    </section>
  </body>
</html>
If you open that file into your browser you find is empty, but if you inspect the page you find is not, that’s because we don’t have any content yet. So first, we’re going to create the buttons.
For the buttons this is what we need: create 2 buttons, one for print and one for back to home. Add the following code into the section with the bill-action class.
<button id="print">Print</button>
<button id="new">New</button>
Now, let’s add som functionality with some JS for this buttons. As the JS on the index.php page, you can added into the file or into another file. I’m adding this into the same bill.php file into script tag.
(function() {
  let printButton = document.querySelector('#print');
  let newButton = document.querySelector('#new');

  printButton.addEventListener( 'click', function( e ) {
    window.print();
  });
  newButton.addEventListener( 'click', function( e ) {
    window.location = './index.php';
  });
})();
If you go to the page, You can see two buttons, with no style and placed on the top left portion of the page.
Let’s place the content to the bill?
I’m going to create 4 sections into this bill (a header, a user details, a products details and a total) and all of this info I’m going to added into bill-print section.
So, for the header I’m going to add a business name, an addres, a phone and the time.
<div class="bill-print-header">
  <h1>Fancy Business</h1>
  <p>
    <span>Cra. 49, No. 7 Sur - 50</span>
    <span>Medellín, Antioquia</span>
  </p>
  <p>Telefono: +57 (4) 2619500</p>
  <p><?php echo date('d/m/Y H:i'); ?></p>
</div>
Ps: Yeah, the details of address and phone are real, this is the address and phone for Universidad EAFIT, Medellín Campus
Now, let’s add the user details under this header.
<div class="bill-print-user">
  <p class="bill-print-user-name">
    <span>Client:</span>
    <span><?php echo $_POST['name']; ?></span>
  </p>
  <p class="bill-print-user-id">
    <span>ID:</span>
    <span><?php echo $_POST['id']; ?></span>
  </p>
</div>
As you may notice I’m using here the $_POST variable, this is a Global variable that is populated when we place a POST call to any URL that is using PHP. On this project we’re sending a request POST from the form on index.php to this file. So this is why we are using this variable.
JFYI: on other languajes is also present a POST variable with this data, but there you can see it with other name, under another object or with other way to access this data.
Now, Let’s add the products details of the order after the user information. But before we add this part of HTML, let’s consider this.
We’re getting an array with just ID’s on the products info, this ID’s represents the position of the element on the $products array into products.php. So we need to get that info for each bill.
So, on the header, after the @include_once and before the php closing we need to add the next code.
$bill = array(
  'products'  =>  array(),
  'total'     =>  0
);

$billProducts = array_map('intval', explode(',', $_POST['products']));
foreach ( $billProducts as $key => $index ) {
  $bill['products'][] = $products[ $index ];
  $bill['total'] = $bill['total'] + $products[ $index ]['value'];
}
Here we are creating a $bill variable, on this we’re going to save each product of the bill and a total value for the bill.
After that, we’re creating an array of Integers from the products input and name it as $billProducts
And finally we’re getting the info for each of the products into $billProducts and pushing the element to the $bill['products'] array and adding the value of each item into the total ($bill['products']).
Now! let’s add the HTML/PHP after the users details
<div class="bill-print-products">
  <p>
    <span>Product</span>
    <span>Value</span>
  </p>

  <?php foreach ( $bill['products'] as $key => $product ) { ?>
    <p>
      <span><?php echo $product['name']; ?></span>
      <span><?php echo $product['value']; ?></span>
    </p>
  <?php } ?>
</div>
Here we are using a foreach as a cycle to add each element of the $bill['products'] into the information that we are showing to the user.
Finally let’s add the HTML for the total after the products section, on this one we are using the $bill['total'] to show the total of the bill.
<div class="bill-print-total">
  <p>
    <span>Total:</span>
    <span><?php echo $bill['total']; ?></span>
  </p>
</div>
Now, if you go to the page into your browser you can try the buttons, they’re work good. You can see something link the next screenshot, is so ugly (That’s because we don’t have any style yet).
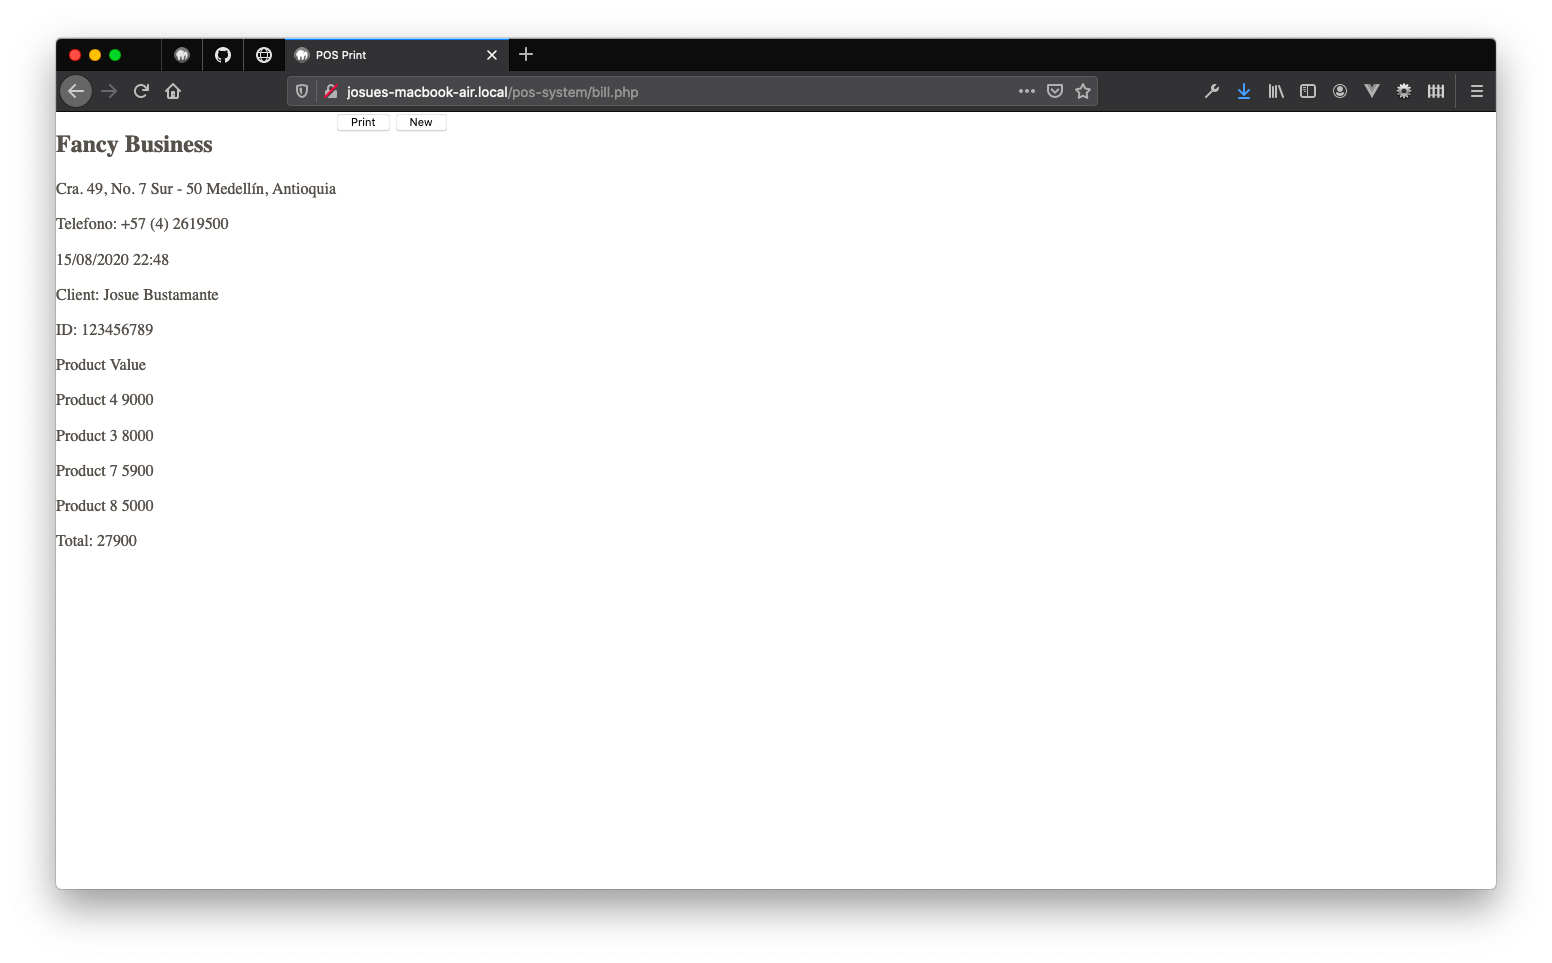
So, let’s make the last change to this project and we are done. This is the styling process for this last part.
style.css
You may notice the buttons are at the side of the bill, but we need they are showed under the bill. So we need to add this rule.
Please review if you have a class on the body of this page called bill (into your bill.php), if you don’t have it, please add it
body.bill {
  flex-direction: column;
}
Now let’s add the code for the bill, the part that we want to print
/* Giving a max width of 350px.
    Centering the content into the middle of the page.
    Giving a border to create a separation of this content
    with the others content into the page. */
section.bill-print {
  display: block;
  border: 1px solid #56514B;
  box-sizing: border-box;
  margin: 2rem auto;
  max-width: 350px;
  padding: 2rem 1.5rem;
  width: 100%;
}
/* Removing margins for h1 and p tags */
section.bill-print h1 {
  margin: 0;
}
section.bill-print p {
  margin: 0;
}
/* We want to show all the span's on the same line of the other */
section.bill-print p span {
  display: inline-block;
}
/* Giving a bold size and floating the text to the right
    to all the second spans into each p tag */
section.bill-print .bill-print-user p span:last-of-type,
section.bill-print .bill-print-products p span:last-of-type,
section.bill-print .bill-print-total p span:last-of-type {
  font-weight: bold;
  text-align: right;
  float: right;
}
/* Giving a bold size for the title of the "table" of products */
section.bill-print .bill-print-products p:first-of-type {
  font-weight: bold;
}
/* Centering all the info into the header */
section.bill-print .bill-print-header {
  text-align: center;
}
/* Creating some style to give the sensation
    of multiple boxes or different content */
section.bill-print .bill-print-user {
  border-top: 1px solid #56514B;
  border-bottom: 1px solid #56514B;
  margin: 1rem 0;
  padding: 0.5rem 0;
}
section.bill-print .bill-print-total p {
  border-top: 1px solid #56514B;
  margin-top: 1rem;
  padding-top: 0.5rem;
}
Now let’s style the buttons that we call bill-actions.
section.bill-actions button {
  display: block;
  background: #56514B;
  border: 1px solid #56514B;
  border-radius: 5px;
  box-sizing: border-box;
  color: #E7E5DD;
  font-size: 1rem;
  margin: 1rem auto;
  max-width: 350px;
  padding: 0.5rem 1.5rem;
  transition: 0.3s ease-in-out;
  width: 100%;
}
section.bill-actions button:hover {
  background: #E7E5DD;
  border: 1px solid #56514B;
  color: #56514B;
}
And finally, we don’t want to print the buttons into the bill, so, we remove that from the impression page.
@media print {
  body {
    min-height: unset;
  }
  section.bill-actions {
    display: none;
  }
}
Now you have a simple POS system.
This is how looks the bill.php page.

And this is how looks the print into a PDF file.
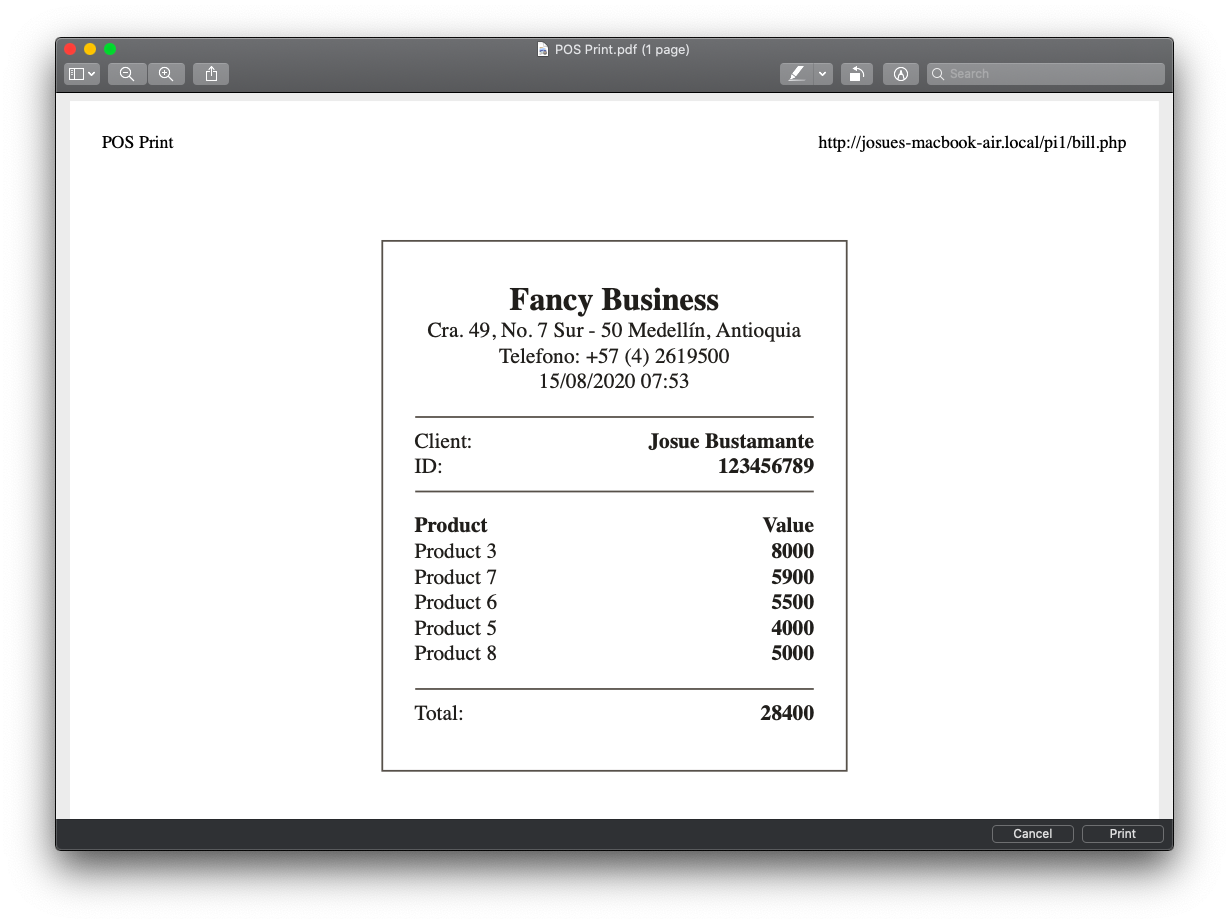
Remember, All of the code for this project you can fint it on the Github Repository.
Posted in